AI workloads on Talos Linux
February 13, 2025
6 min read
Companies are exploring how to run GPU accelerated workloads on Kubernetes. It doesn’t matter if you have a business use case for AI or not, knowing how it works is important.
But connecting a GPU and deploying the NVIDIA operator the same way you do on other, traditional Linux distributions won’t work on Talos Linux. Talos prioritizes security, and only allows the loading signed kernel modules; the file system is read only, and there is no /bin/sh binary on the system—which is expected by the NVIDIA Operator.
However, Sidero Labs has solved the difficulties of loading kernel modules without compromising security by the use of system extensions. We create and distribute signed and validated extensions for each release of Talos. The Image Factory—which is built in to Omni—makes extension lifecycle management simple and automated, so getting secure NVIDIA support on your bare metal running Talos is actually easier than traditional Linux as we will see.
Let’s walk through the steps to deploy the Deepseek-r1 LLM using Ollama on a bare metal Kubernetes cluster. Most of this information is taken directly from our documentation, but we’ll add some details on getting Ollama deployed.
If you’d like to watch a video on the required steps check it out here.
Boot a machine
The first thing you need to do is boot a machine with Talos Linux. We recommend using Omni because it makes cluster creation and patch management easier, but all the steps are the same with Talos.
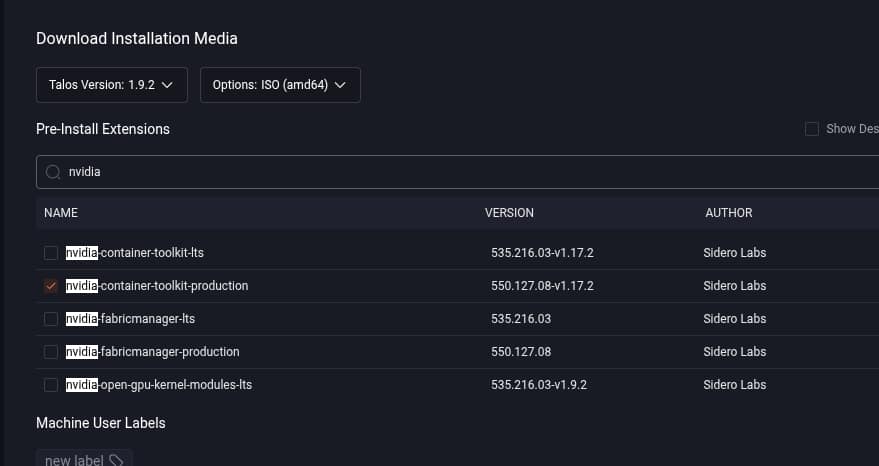
In Omni go to the home screen and click Download Installation Media on the right. When the media selection window opens you can search in the pre-install extensions window for “nvidia” and select the “nvidia-container-toolkit-production” and “nonfree-kmod-nvidia-production” extensions.
Make sure you change the download type to ISO if you’re installing on a bare metal server.
If you’re using Talos without Omni you can download installation media from the Image Factory. Here’s a schematic with the extensions included and Talos 1.9.3.
Create a cluster
We need to install Talos and create a cluster next. In Omni you can click on Clusters -> Create Cluster. Select the node you want to be part of the cluster and then create.
If you’re using Talos you can generate a configuration with talosctl gen config and then apply that to the node with talosctl apply -f controlplane.yaml. See the getting started docs for generic steps to create a cluster.
Load kernel modules
Now that we have a system installed with the correct drivers on disk we need to load the kernel modules so the GPU is usable.
In Omni you can create a patch in the cluster and target your node. The patch will load the kernel modules and allow the ext-nvidia-persistenced service to become healthy.
machine:
  kernel:
    modules:
      - name: nvidia
      - name: nvidia_uvm
      - name: nvidia_drm
      - name: nvidia_modeset
  sysctls:
    net.core.bpf_jit_harden: 1
We also need to change the default container runtime to use the nvidia container toolkit we added earlier. That is a patch to update containerd config.
machine:
  files:
    - op: create
      content: |
        [plugins]
          [plugins."io.containerd.cri.v1.runtime"]
            [plugins."io.containerd.cri.v1.runtime".containerd]
              default_runtime_name = "nvidia"
      path: /etc/cri/conf.d/20-customization.part
If you don’t want NVIDIA to be the default container runtime you can create a Kubernetes Runtime Class, but we’ll leave out that configuration to keep things simple.
Discover GPU devices
This step isn’t required but is often helpful when dealing with extra devices on Linux. Traditionally you’d run something like lspci and grep the output to try and figure out what GPU is installed on the system.
Because everything is API driven in Talos we have structured data we can get the device details. This command will work the same way via Omni or Talos.
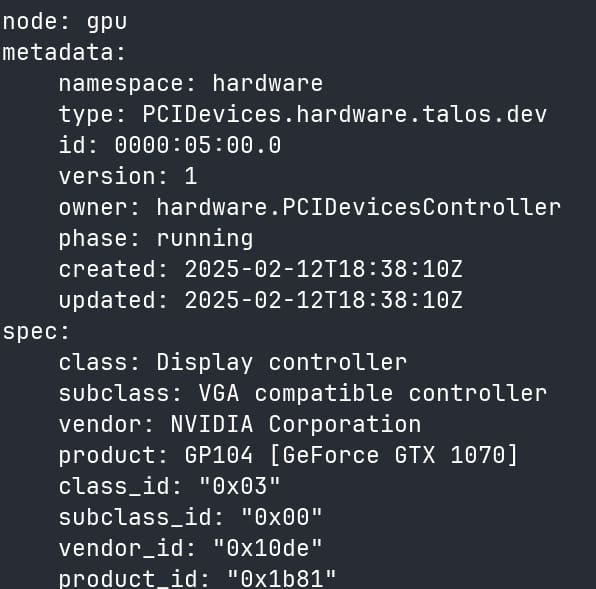
talosctl get pcidevices -n $NODE | grep NVIDIAThe output will look something like this

You can look at the ID column and find your display device where the vendor is NVIDIA. Now you can get more details about the device with.
talosctl get pcidevices -n $NODE 000:05:00.1 -o yamlThis will have model information.
It’s not a necessary step, but shows the power of a Linux distribution with structured data presented over an API.
Add GPU Capacity
Even though the GPU is detected and ready on the node the Kubelet doesn’t expose it as capacity. For that we need to load the NVIDIA device plugin.
Device plugins are how the kubelet knows about additional capacity on a node. It runs as a daemonset and communicates with the kubelet to let it know how many GPUs are available and if they’re healthy.
You can deploy it from their instructions with:
kubectl create -f https://raw.githubusercontent.com/NVIDIA/k8s-device-plugin/v0.17.0/deployments/static/nvidia-device-plugin.ymlAfter it’s running you should be able to query your node and see nvidia.com/gpu capacity.
kubectl get no -o json $NODE | jq '.status.capacity'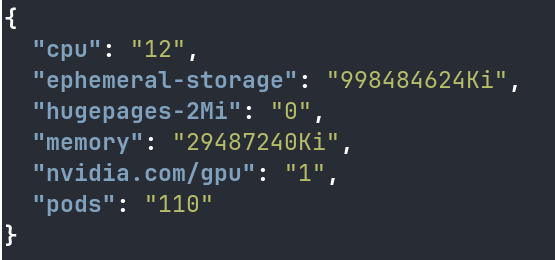
Deploy Ollama
Now that the GPU drivers are loaded and the kubelet knows about the GPU capacity it’s time to create our workload.
Create a namespace that allows privileged containers
cat << EOF | kubectl apply -f -
apiVersion: v1
kind: Namespace
metadata:
  name: ollama
  labels:
    pod-security.kubernetes.io/enforce: privileged
EOF
and then deploy Ollama with helm.
helm install ollama ollama-helm/ollama \
  --namespace ollama \
  --set ollama.gpu.enabled=true,ollama.gpu.type=nvidia
This will create a deployment that consumes 1 GPU on your node. You can verify that by looking at the deployment spec.
kubectl get deploy -n ollama ollama -o yaml | grep nvidiaOr by looking at the pod logs which should have something like this in the output
level=INFO source=types.go:131 msg="inference compute" id=GPU-7276e57a-403d-149e-5a1c-b5eef109a6f1 library
=cuda variant=v12 compute=6.1 driver=12.4 name="NVIDIA GeForce GTX 1070" total="7.9 GiB" available="7.8 GiB"
Pull and run an LLM
Now you can connect to the Ollama service with port forward
kubectl port-forward svc/ollama -n ollama httpThis will connect port 11434 (it spells “llama”) to your localhost and you can run the ollama command like you normally would.
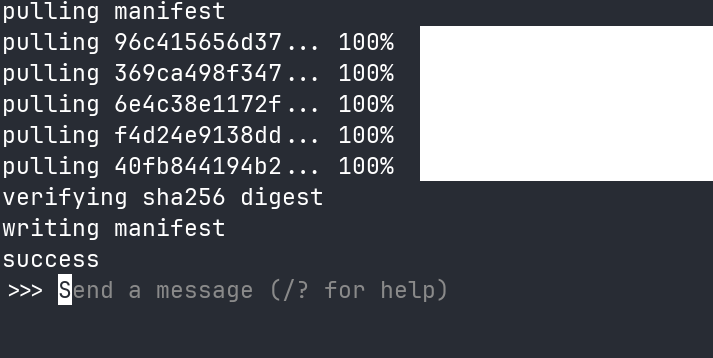
ollama run deepseek-r1Your output will look something like this.
The cloud is great for cheaply iterating on approaches, but expensive if you find success and need to scale and maintain long running resources. AI requires a lot of data and compute—two things that cost a lot of money to rent. If you’re planning to run GPU workloads for the long term, you should plan for success and don’t leave yourself open to big surprise bills.
If you’re serious about succeeding, sign up for Omni and get started with infrastructure you already have.